Client Portal: What Your Clients See and How to Set It Up
How the Lifted Work Client Portal works: tabs, requests, deliverables, services, and how to configure it per client.
What the Client Portal Does
The Lifted Work Client Portal is where your agency’s work becomes visible to your clients. It shows progress, handles requests, and lets clients review and approve deliverables without extra emails or status meetings.
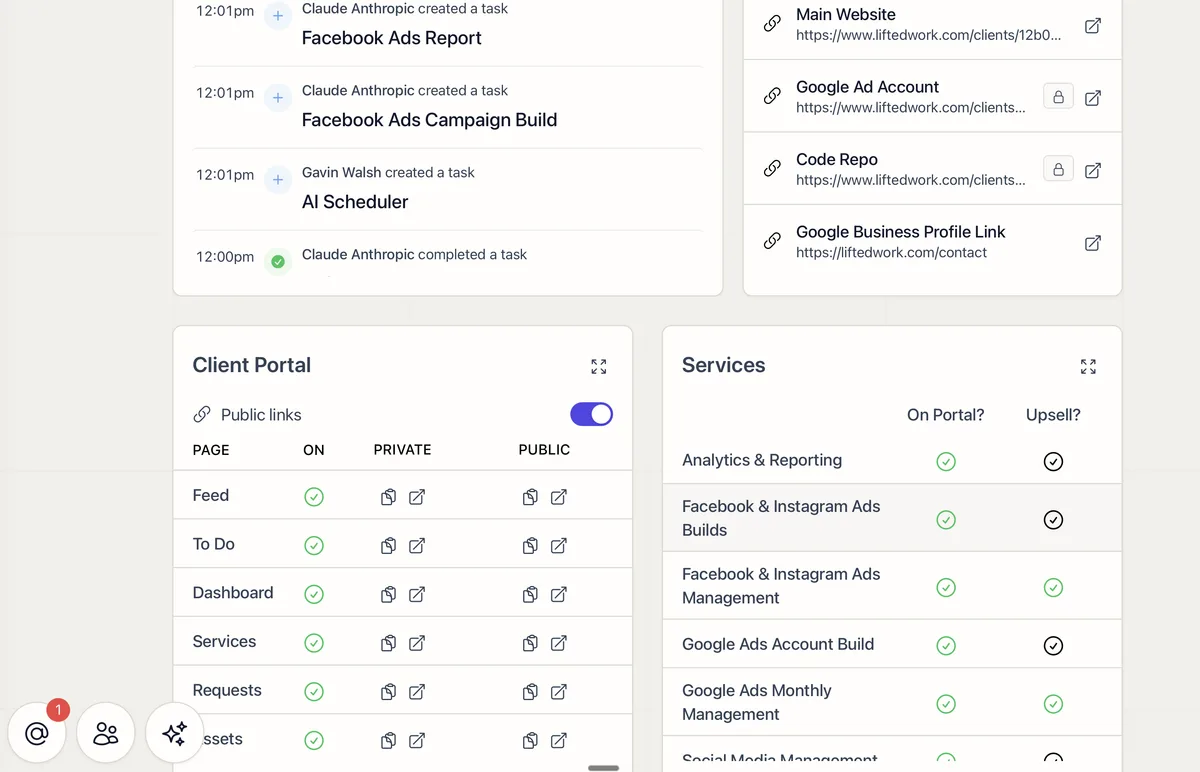
The portal has seven tabs: Feed, To Do, Dashboard, Services, Requests, Assets, and Deliverables. Each can be toggled on or off per client from their portal settings.
The Feed Tab
The Feed is the main view your client sees. It shows a chronological stream of:
Completed tasks: auto-populated the moment you mark them done, showing the author’s name
Notes you’ve posted for the client
Videos, images, PDFs, and embeds you’ve uploaded
Clients can’t click into task details or see internal notes. Your internal work stays private. They just see that work is getting done.
The Dashboard Tab
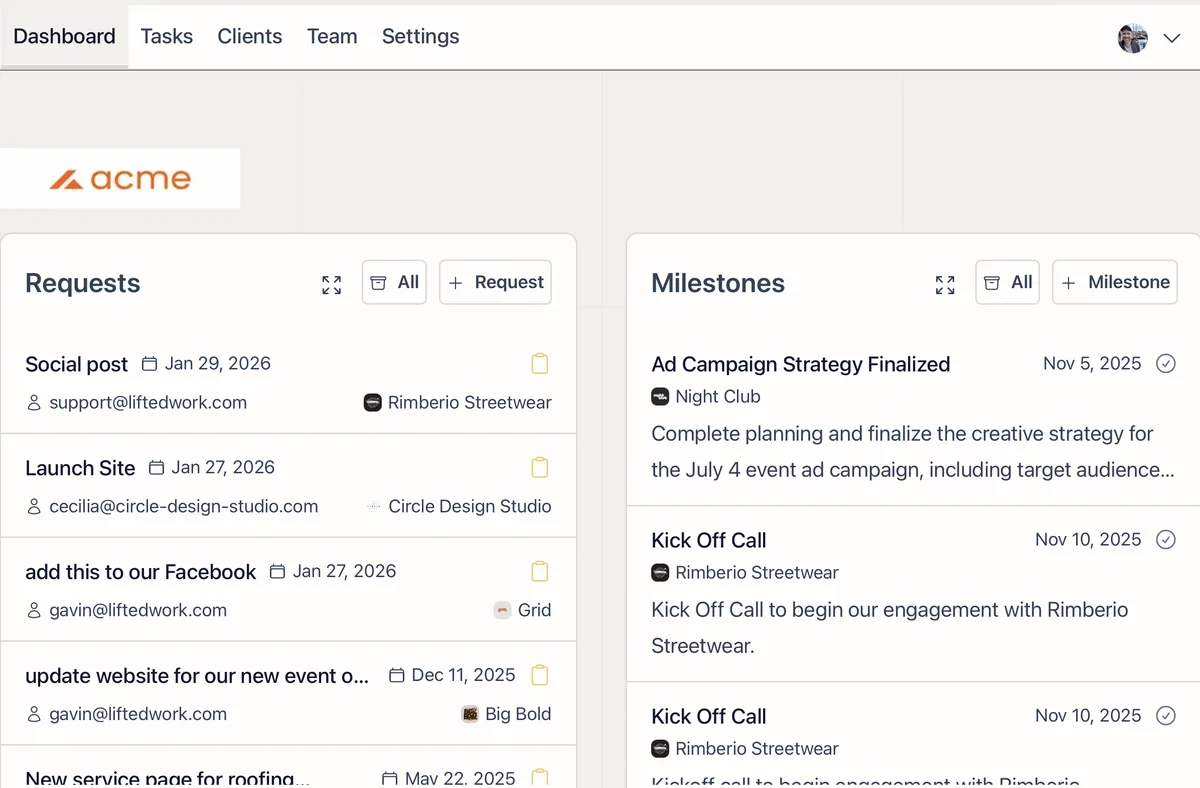
The Dashboard gives clients a structured view of:
Links: client-facing links you’ve set up (important URLs, login pages, assets)
Milestones: upcoming and completed milestones with dates and descriptions
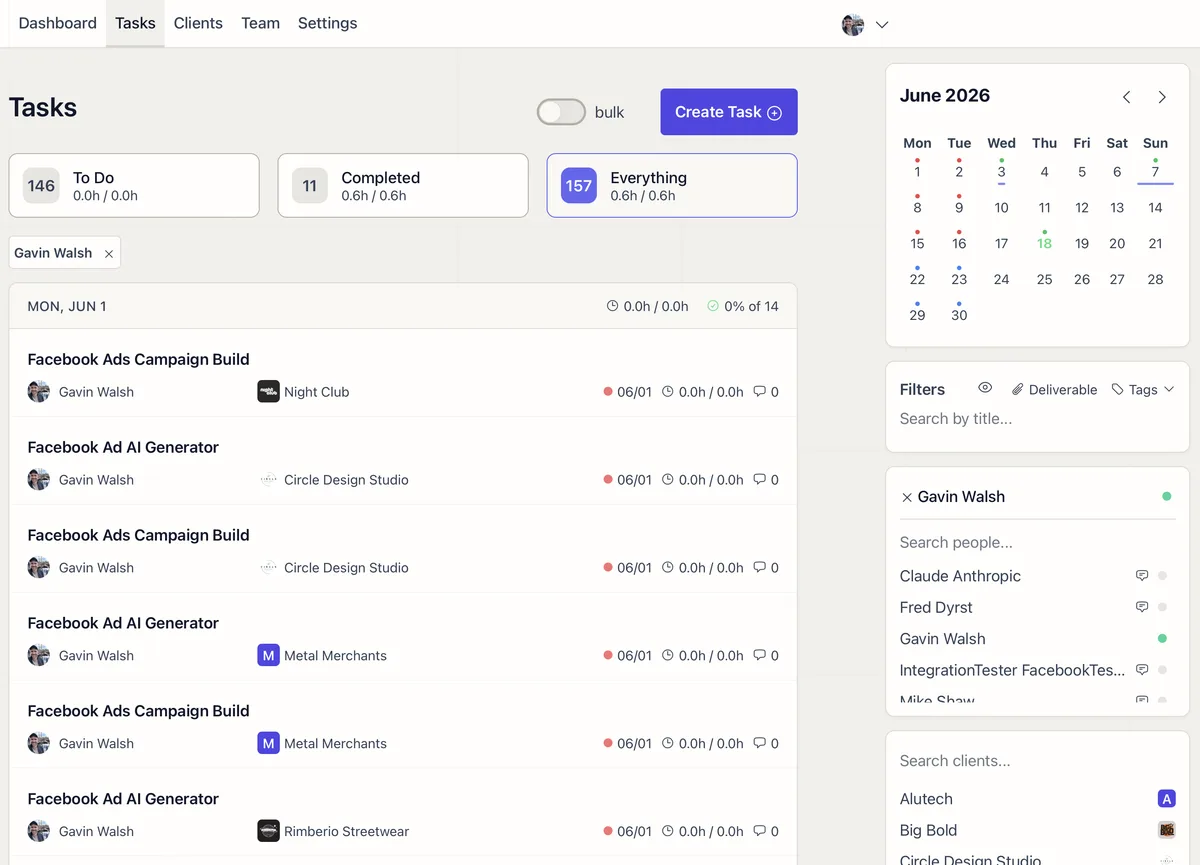
Monthly calendar: tasks grouped by day for the current month, with a toggle to view next month
The Services Tab
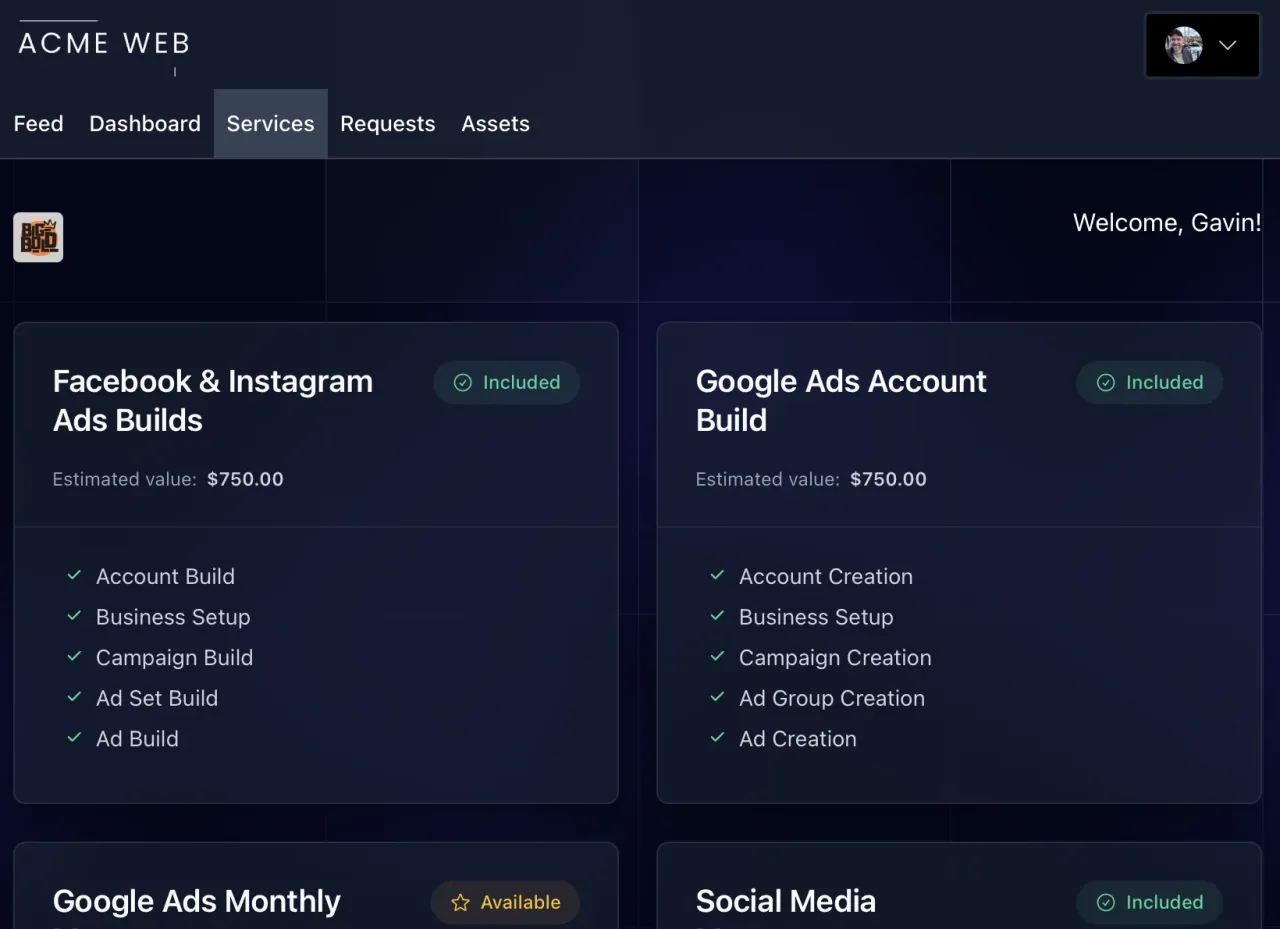
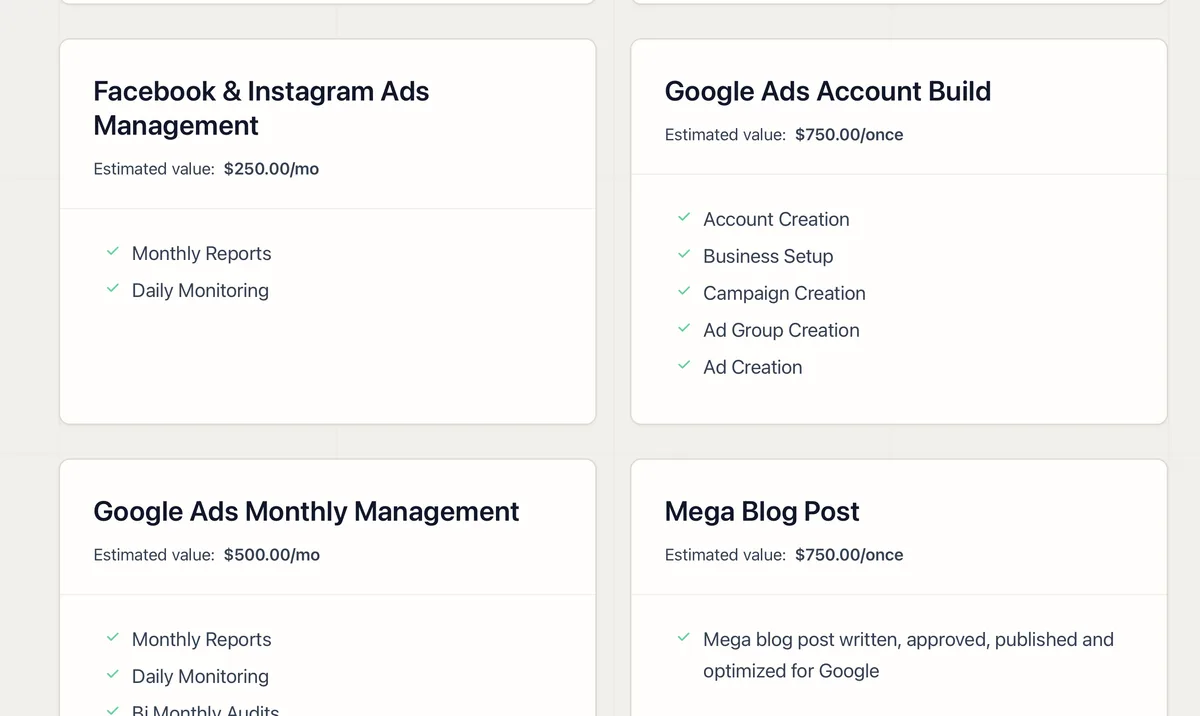
The Services tab shows clients what they’re getting and what else is available.
Each service includes:
Service name (e.g., “SEO Monthly Audit”)
Description with value statements
Estimated value (optional, for price anchoring)
Frequency: one-time, monthly, weekly, etc.
Services are marked as either Included (active) or Available (upsell). The Available badge becomes a clickable link if you add a purchase URL. It’s a passive upsell tool that works every time your client logs in. Services and Upsells has the full setup.
Make It Easy for Clients to Submit Requests
From the Requests tab, clients can click New Request to:
Describe a request in their own words
Upload files (supports PDFs, images, videos, documents, up to 50 files, 100MB each)
Submit directly into your system
On your side, you’ll see it appear under your Requests panel. You can:
Review the request
Turn it into a task
Reference a Task Template to prefill time estimates, instructions, and SOPs
Requests show their status to the client: Pending, Scheduled, or Closed.
Client-Facing Tasks and the To Do Tab
Need your client to complete a task (like granting account access or approving content)?
Create a task with visibility set to Standard or Client Only, and it appears in the client’s To Do tab. Client-facing tasks include:
Instructions from your Task Template (SOPs, embedded Loom videos, Scribes)
Assignment to a specific contact at their company
Deliverables for review (clients see a count badge showing items waiting for their feedback)
Clients can:
View the task and instructions
Review and approve deliverables
Leave comments
Mark the task as complete
Build these once in a Task Template and reuse them for every new client.
Collaborate Through Feed Notes
Post notes directly to a client’s Feed:
Share progress updates
Add expected timelines
Attach videos, images, or PDFs
Clients see your messages in their Feed alongside completed tasks and uploads. No extra email needed.
The Deliverables Tab
The Deliverables tab shows all deliverables across a client’s tasks that are waiting for review. Each deliverable displays a thumbnail, title, and revision number. Clients can:
Approve a deliverable
Request changes with a comment
View the full deliverable content and comment thread
When all deliverables on a task are approved, the task is automatically marked complete.
The Assets Tab
Clients can view and upload files in the Assets tab. Use this for brand assets, shared documents, or deliverable files that need a permanent home outside of individual tasks.
Use Task Templates to Standardize Client Touchpoints
Anything you ask for repeatedly from clients, such as account access, brand guidelines or content approvals, can be turned into a reusable Task Template.
Each time you use it, Lifted Work:
Assigns the task to the right client contact
Pulls in any videos, checklists, or SOPs
Tracks completion in the portal
Keeps everything branded, clear, and centralized
Setting Up the Portal for a Client
From the client’s overview, open Portal Settings to toggle which tabs are visible. You can enable or disable any of the seven tabs per client, so you can hide Requests or Deliverables if a client doesn’t need them.
Once the portal is configured, invite the client’s contacts so they can log in and start using it.
FAQ
Frequently asked questions
Which client portal tabs should an agency enable first?
Start with the sections the client will use immediately, often Feed, To Do, Requests, and Deliverables. Add Services, Assets, Dashboard, or other sections when they contain current information; an intentionally small portal is better than several empty tabs.
How should an agency turn a portal request into scheduled work?
Review the request for scope and missing details, respond to the client if clarification is needed, then convert it into a task with an owner, due date, time budget, and template. Update the request status so the client can see that it has been scheduled.
Can clients see an agency's internal notes or task details?
Clients see only content exposed through their portal permissions and the visibility set on tasks and comments. Internal client notes remain private. Preview the portal as the client whenever you change visibility or add a new section.
How do you get clients to use a new portal?
Give the portal a concrete job from the start: assign one onboarding to-do, place the first deliverable there for approval, and ask the client to submit future requests through it. Explain where email still belongs so the process is easy to follow.